The ICOS Shell
While we have introduced several components as part of our series of blog posts, we did not cover the user interface yet, which will be the focus of this article.
The user interface - the ICOS shell - consists of two separate frontends; a command line interface (CLI) as well as a graphical user interface (GUI). In its current version, the CLI implements the majority of the functions, while the GUI is actively being worked on. The ICOS shell backend serves as the entry point to the ICOS system and is the user's portal to interact with ICOS controllers.
The CLI
The ICOS CLI currently comes in several flavors:
- linux-amd64: a version compatible with most desktop PCs and laptops
- linux-arm64: a version for mobile and other lightweight devices
- darwin-arm64: a version for M1/2/3/4 Mac(book)s
- darwin-amd64: a version for older (pre-M) Mac(book)s
We provide the newest versions on our Github release page where they can be downloaded. The matching binary can then be executed on the local machine in conjunction with a config file.
The config.yml file needs to adhere to a fixed structure as shown below and provides the necessary information to interact with the ICOS controller.
keycloak:
    pass: KEYCLOAKPASSWORD
    user: KEYCLOAKUSER
lighthouse: LIGHTHOUSEADDRESS
Upon first login, the list of controllers is retrieved from the lighthouse and provided to the user who can then use the arrow keys on the keyboard to select the controller they want to use. After this selection process, the setting is stored and used for all further commands until it is manually removed from the file. To log in, the user issues one of two commands, either:
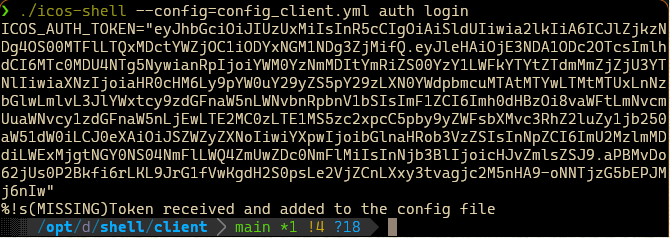
./icos-shell --config config.yml auth login
when user and password are sufficient for logging in (depends on the configuration of the user in keycloak), or:
./icos-shell --config config.yml auth login --otp 123456
if an up-to-date one time pad token is necessary. The validity duration of the token then again depends on the specific keycloak settings and once the token expired, the user will have to log in again. Requests with expired tokens are usually met with an HTTP "401 - Unauthorized" message.
Once the login process is complete, other commands can be issued, examples are listed below.
To list all deployments in the database:
./icos-shell --config config.yml get deployment
To list a specific deployments that you know the ID of:
./icos-shell --config config.yml get deployment --id XYZ
To list all resources currently connected to the controller:
./icos-shell --config config.yml get resource
To create a new deployment:
./icos-shell --config config.yml create deployment --file application_descriptor.yaml
To create a new ML prediction:
./icos-shell --config config.yml predict metrics --file predict.json
Of course the CLI also has a --help parameter that provides explainations for the different options.
GUI
The ICOS GUI is provided as a Docker image and can therefore be deployed and used in a very flexible manner; hosted on and ICOS controller, on an external server, or deployed on a local machine. Users can then call the web interface and log in through the mask shown below.
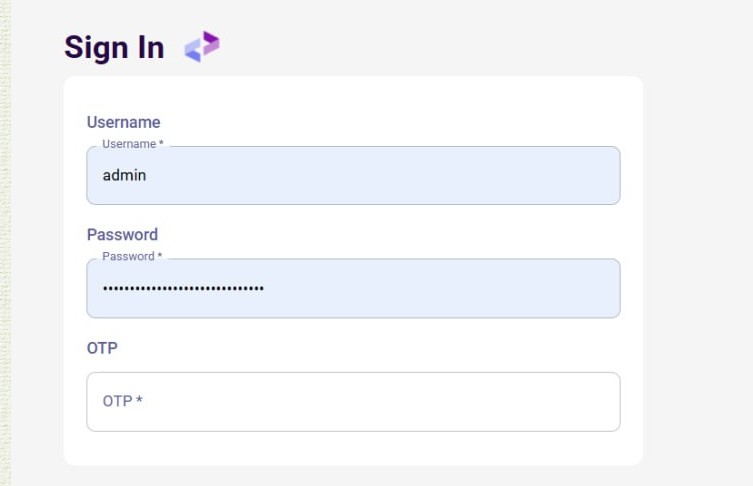
Again you can see the optional field for a one time pad that can be supplied for user accounts configured accordingly. The further screens are then pretty much self-explanatory and will be shown in a different format once all functionalities are implemented.


This project has received funding from the European Union’s HORIZON research and innovation programme under grant agreement No 101070177.